Start Raydar
Start Raydar, Say Goodbye to Crypto Chaos.
Requirements
- Trader
- Any Cryptocurrency Exchanges
- Read Only API Key & Secret Key (Some Exchanges wants Password or Etc.)
How to Add an Account in Raydar?
Connecting your exchange account to Raydar shows your balances, *open orders, transactions, portfolio performance, and more of your exchange data - all in one place.
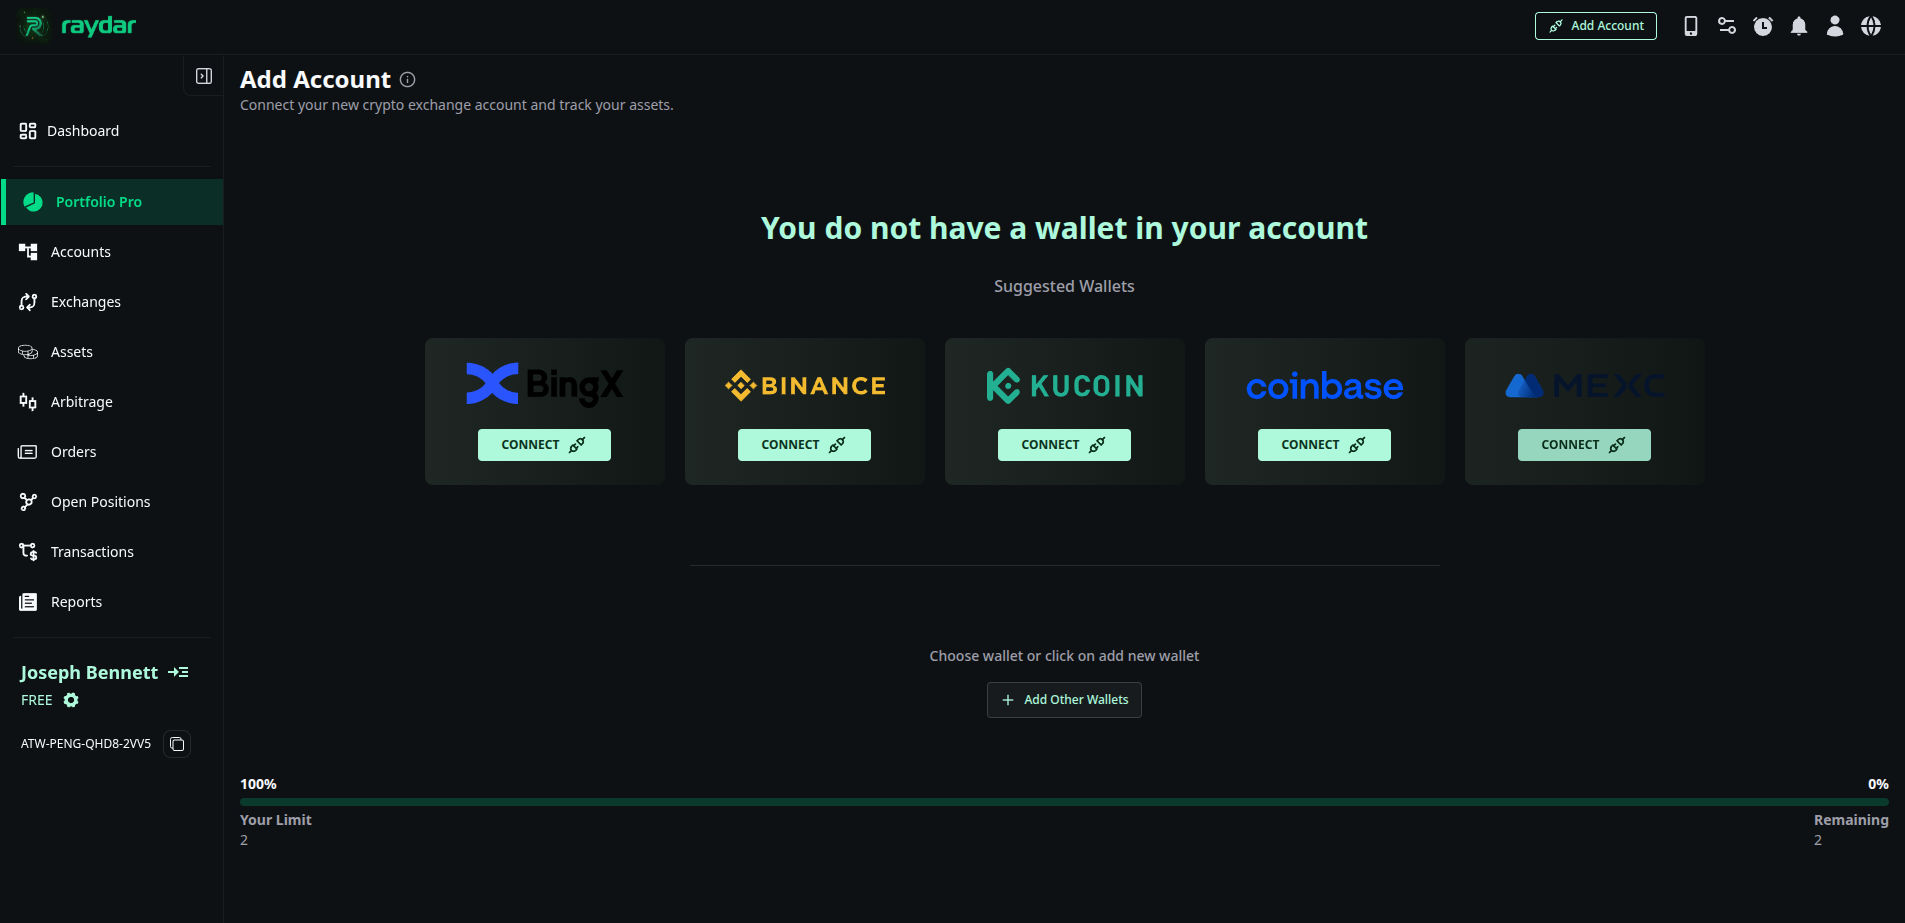
Step 1 - Open the “Add Account” Page
Navigate to the Accounts section on the left sidebar and click Add Account. You’ll see the “Suggested Wallets” section, which includes popular exchanges like Binance, MEXC, Coinbase, BingX, and KuCoin. If you don’t have any connected wallets yet, the screen will display a message:
“You do not have a wallet in your account.”
Each exchange card includes a Connect button.
Step 2 - View All Supported Exchanges
If the exchange you want to connect isn’t listed under “Suggested Wallets,” click + Add Other Wallets. A pop-up window will appear showing all supported exchanges.
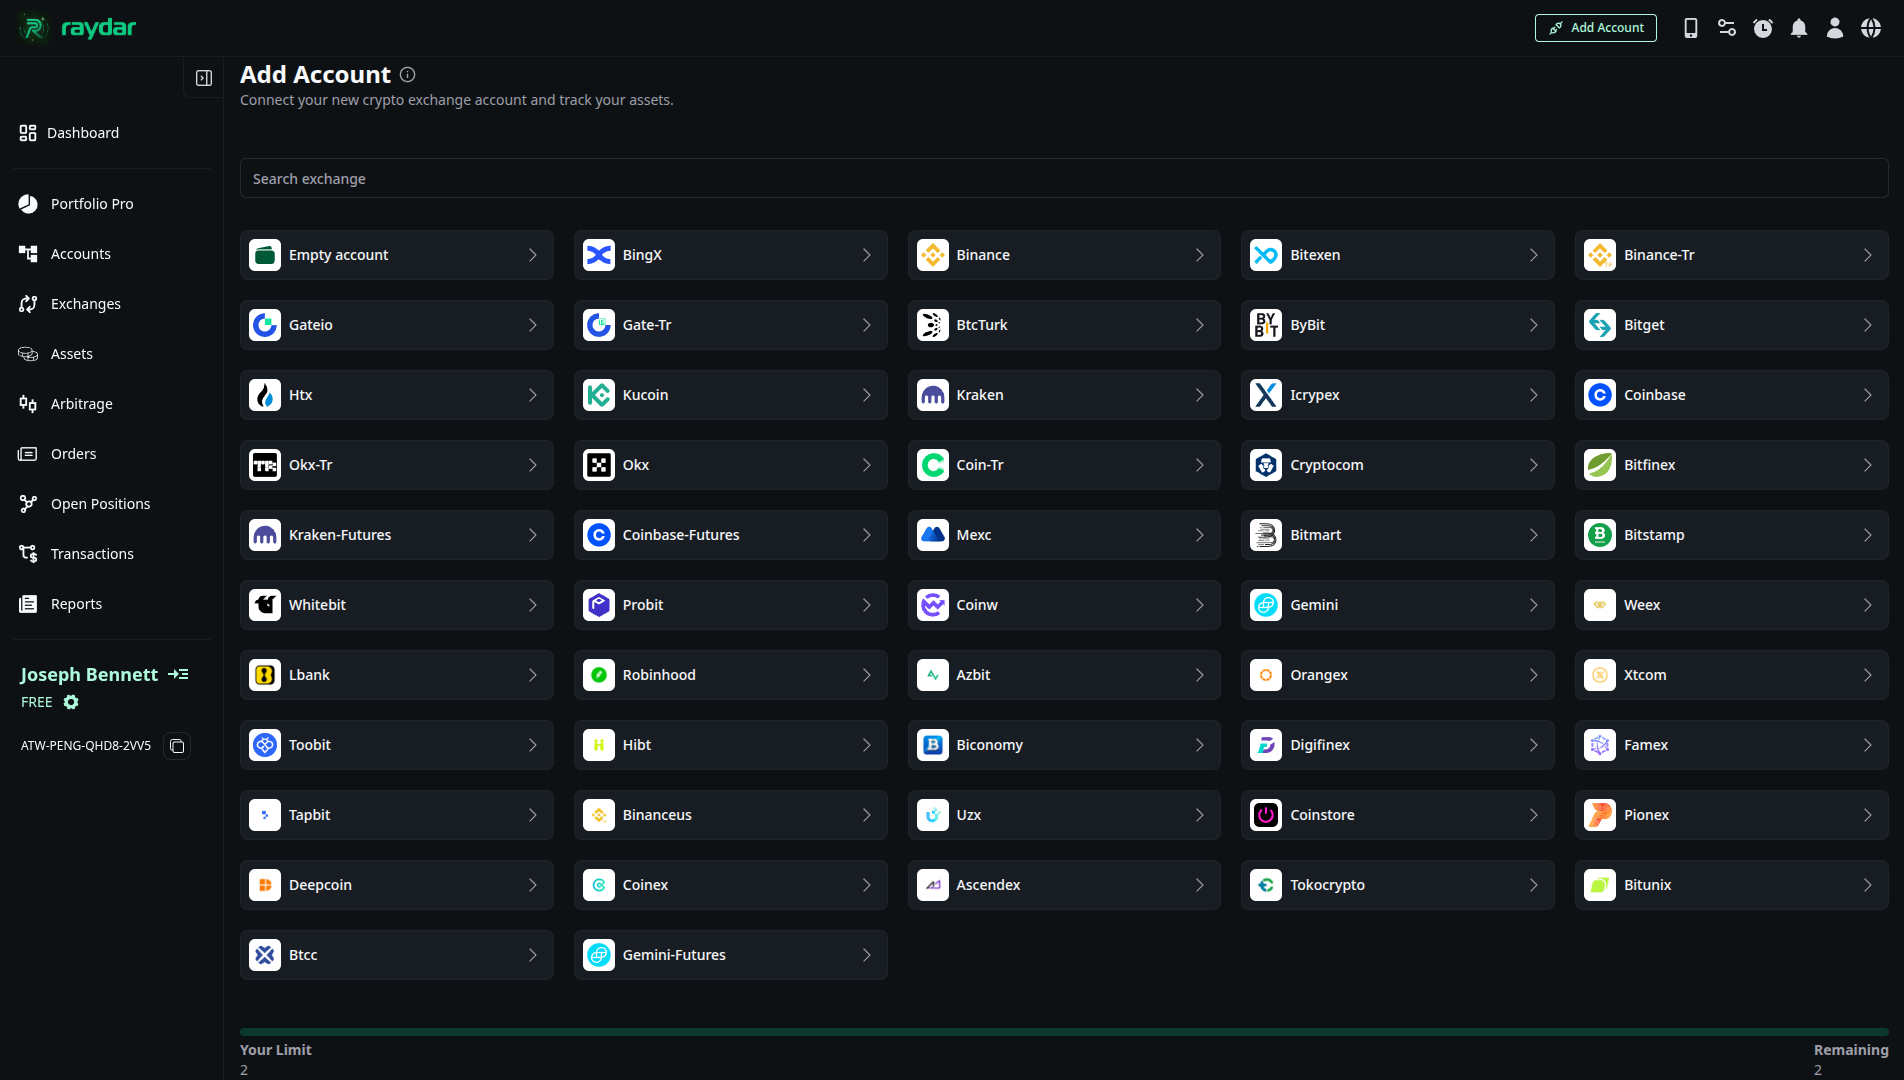
In this list:
- Exchanges that are already connected to your Raydar account are shown with a “Connected” badge.
- Exchanges that are not yet linked display a “Connect” button.
At the bottom of this window, you’ll see a wallet connection limit bar (e.g., 2 / 10). If you reach your current limit, you can click Upgrade to increase the number of wallets available for connection.
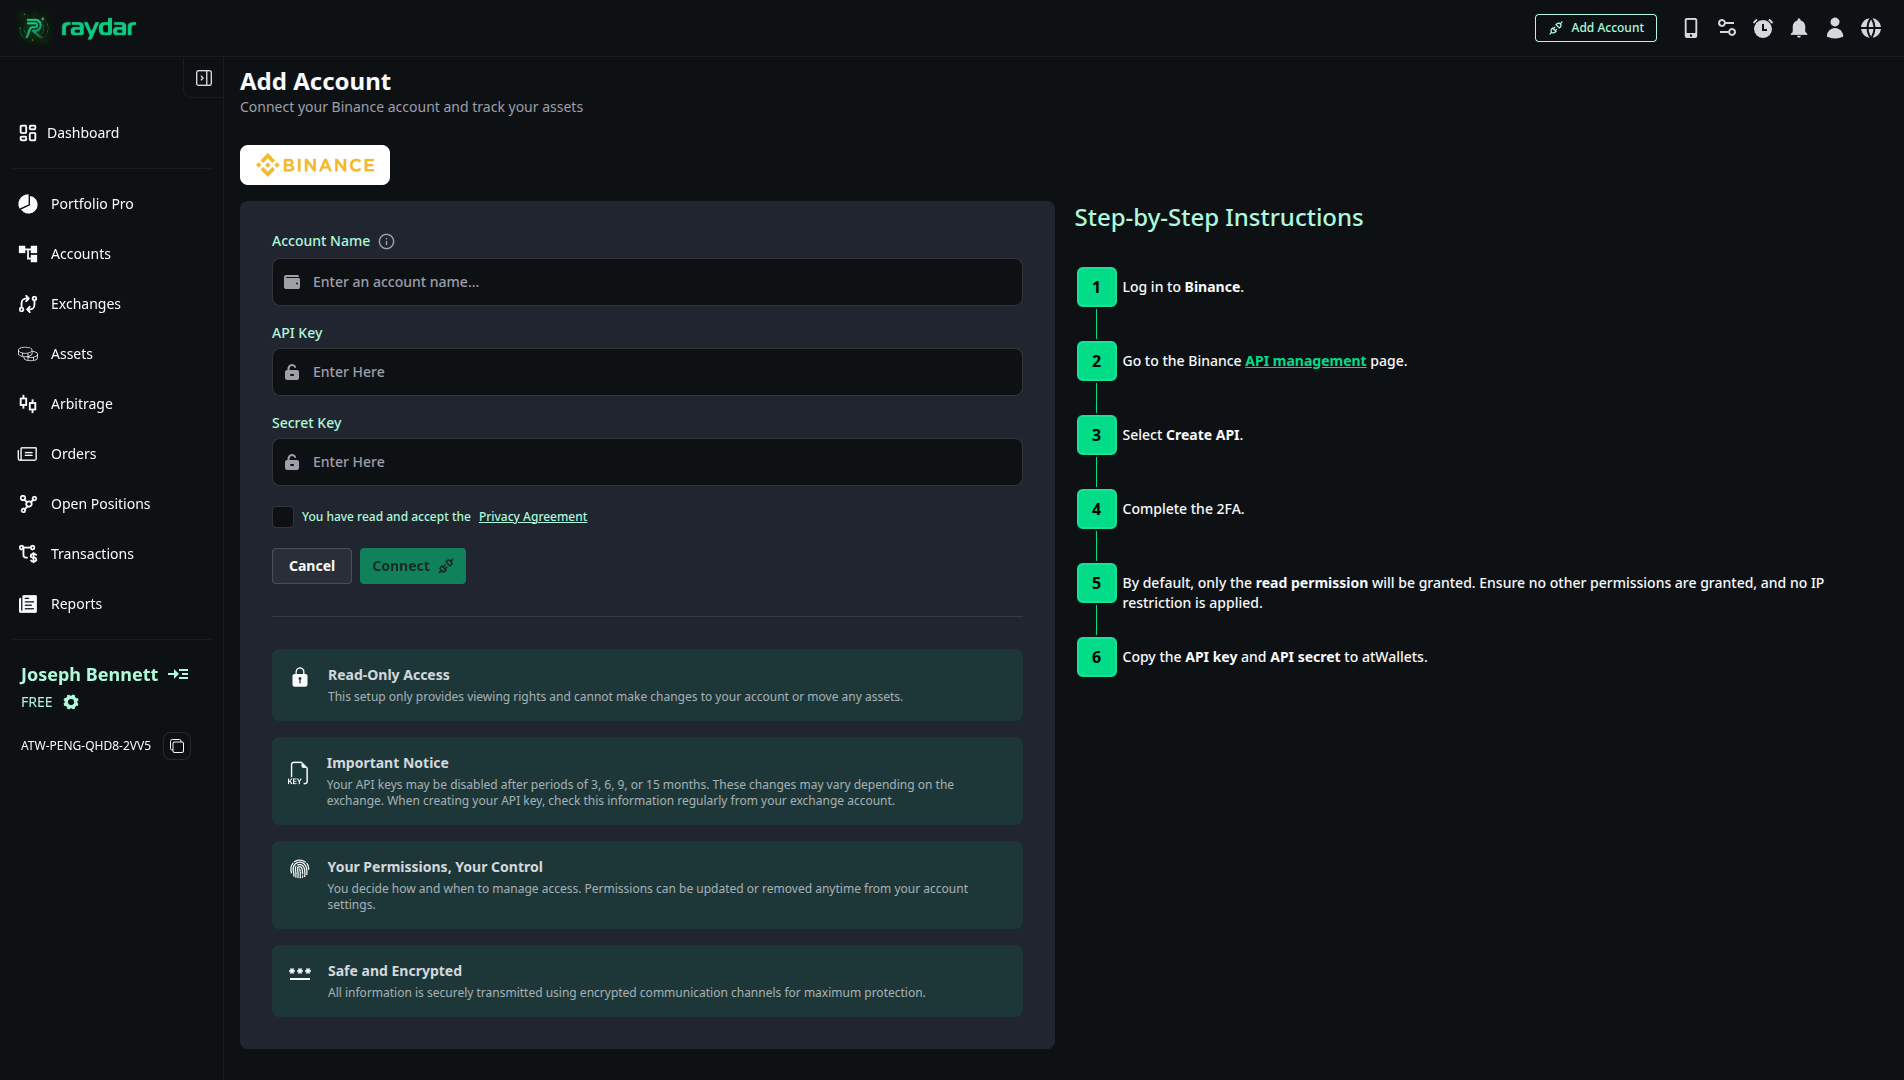
Step 3 - Follow the exchange step-by-step guide
After selecting your exchange, Raydar will display the connection screen. On the left, you’ll see step-by-step instructions showing how to create your API Key and Secret Key on the exchange. On the right, you’ll have input fields where you can paste these credentials.
Step 5 - Connection Confirmation
When the connection succeeds:
- You’ll see a success notification.
- The new wallet will appear under Accounts → Connected Wallets.
- Raydar shows your balances, open orders, transactions, and more of your exchange data.
Example: Connecting an Exchange to Raydar
If an error occurs (e.g. invalid key or expired credentials), Raydar will show an alert so you can fix the issue.
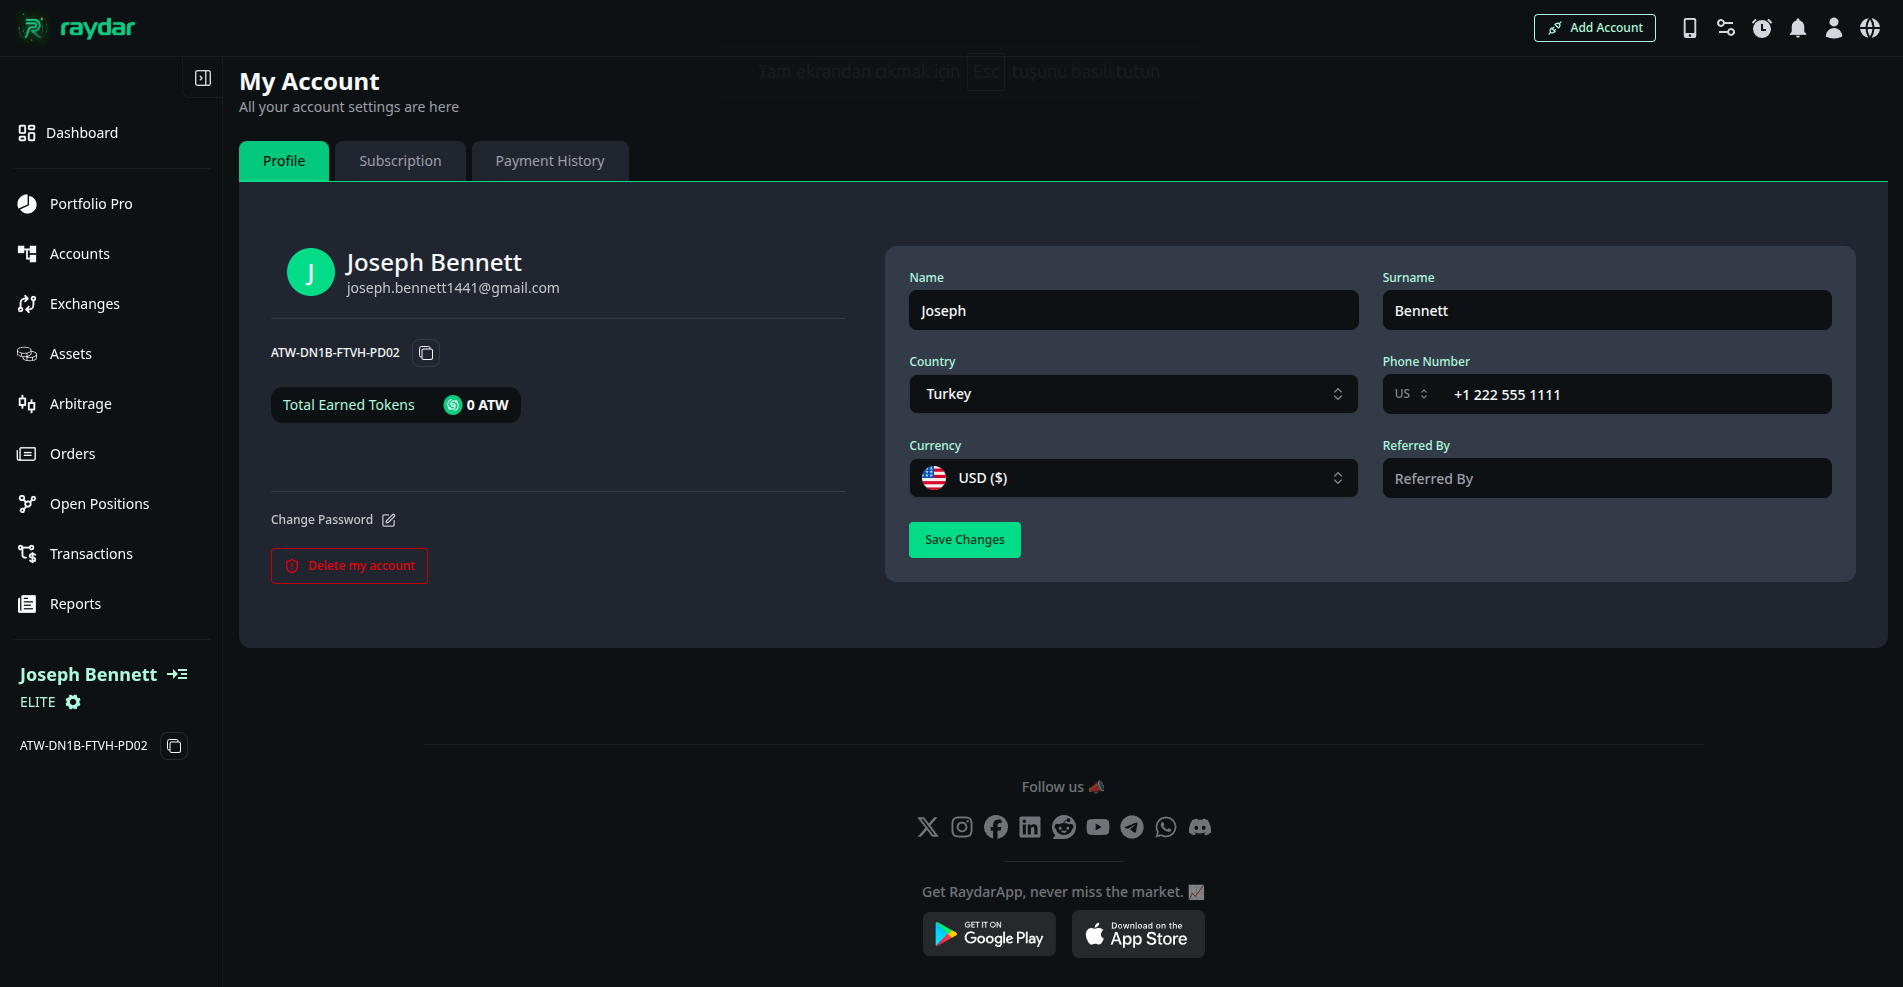
My Account: Profile Settings
The My Account section is where you manage all settings related to your personal Raydar profile, subscription, and payment history.
This guide focuses on the Profile tab, where you can view your personal details, manage your ATW Tokens, and perform account actions like changing your email or deleting your account.
Your Referral Code and ATW Tokens
Raydar rewards users for inviting new traders to the platform through a referral program based on ATW Tokens.
On your Profile screen, you will find:
- Your Unique Referral Code: This code (e.g.,
ATW-32M3-37J9-2B3L) is unique to your account. Share it with friends and colleagues to earn ATW Tokens when they sign up and use Raydar. - Total Earned Tokens: A clear counter showing the total amount of ATW Tokens you have accumulated through the referral program.
Editing Your Personal Information
You can easily update your personal details displayed in Raydar.
To edit your information:
- Locate the personal information fields on the right side of the Profile tab.
- You can update the following fields:
- Name & Surname
- Phone Number
- Country (Used for localization and currency settings)
- Preferred Currency: Select the currency (e.g., USD($) ) you want Raydar to use for displaying portfolio values and reports.
- Referred By: If you were invited by someone, you can enter their referral code here.
- After making any changes, click the Save changes button to apply the updates.
Account Actions
The Profile tab also provides crucial links for managing your account security and status.
Change Email Address or Password
If you need to update the email address linked to your account or change your password for security reasons, click the Change E-mail Address or Password link below your account details.
Delete Account
⚠️ Warning: Account Deletion Deleting your account is a permanent action. All your connected exchange data, transaction history, portfolio reports, and personal settings will be permanently removed from Raydar.
If you wish to permanently close your Raydar account, click the Delete Account button and follow the on-screen instructions to confirm this action.
My Account: Subscription Management
The Subscription tab allows you to view all available Raydar membership plans, compare their features and limits, and upgrade your current plan to access more advanced tools.
Viewing and Comparing Plans
You can switch between Monthly and Yearly billing cycles using the toggle located above the paid plans to see the corresponding pricing.
Raydar offers several tiers, including a Free plan and paid options like Standart, Premium, Elite, and the one-time payment Life Time Elite.
- Each plan card clearly lists the Max Accounts, Transaction Limit, and Advanced Features (such as Real-Time Tracking, Commission Breakdown, and Arbitrage Access) included in that tier.
If you are a paid member, your current plan will be highlighted, for example:
“You are on this plan.”
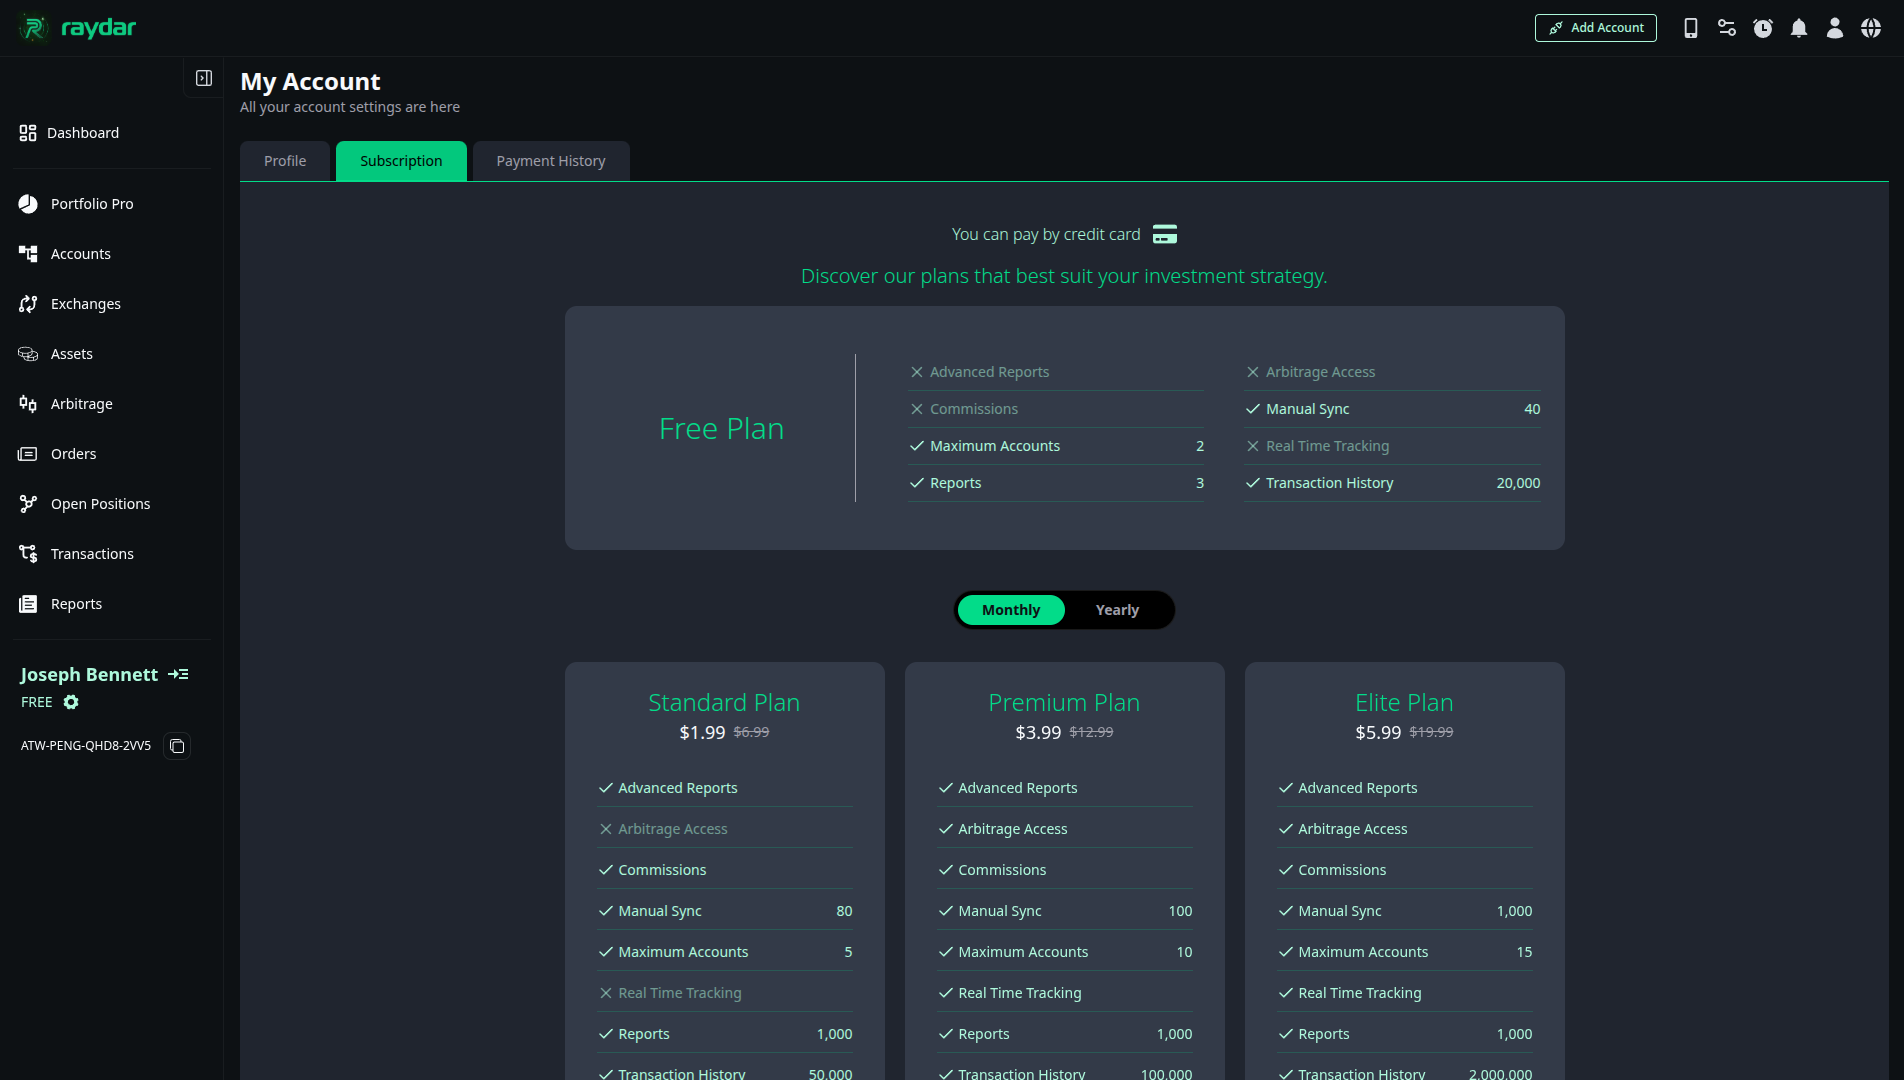
Upgrading Your Plan
To move to a higher-tier plan (Premium, Elite, or Life Time Elite):
- Select your preferred billing cycle (Monthly or Yearly).
- Locate the desired plan card.
- Click the Upgrade button associated with that plan.
- You will be directed to the payment screen to securely finalize your purchase, which is typically processed via Credit Card.
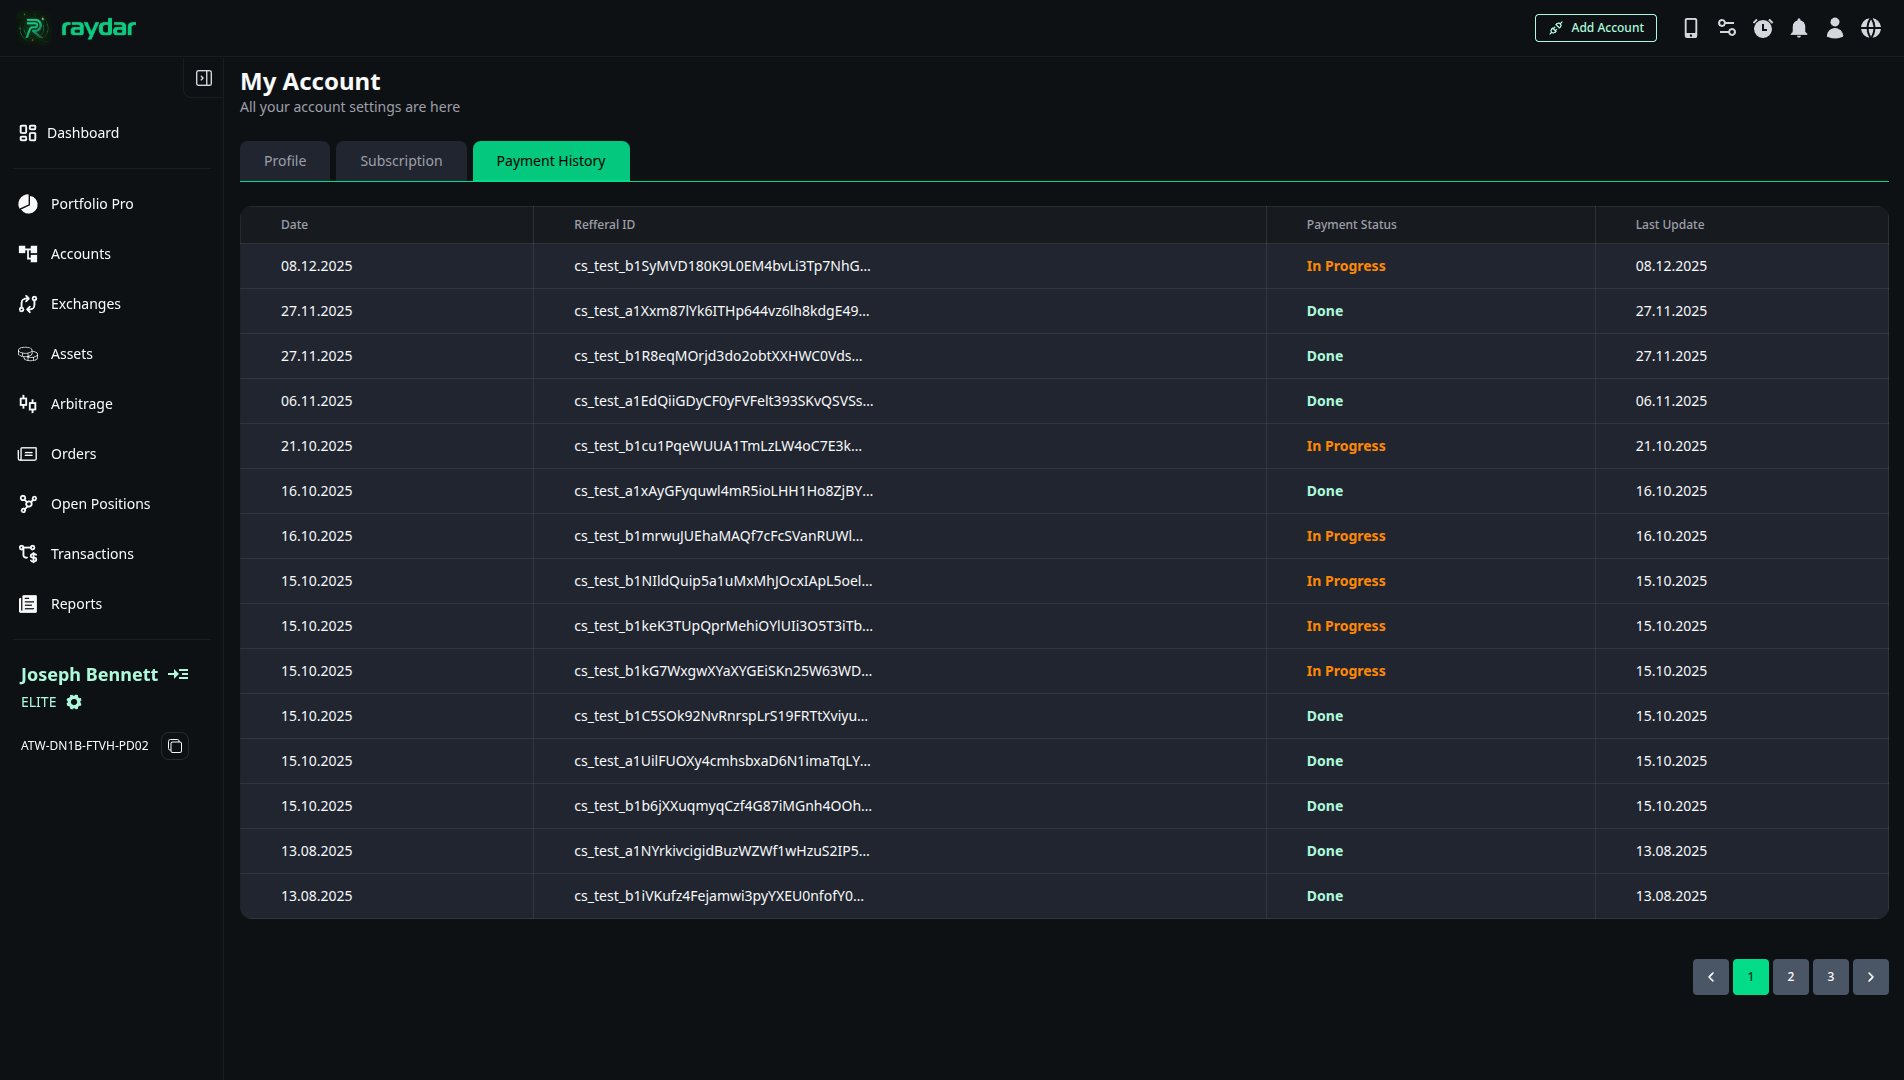
My Account: Payment History
The Payment History tab serves as a log for all your past and ongoing transactions related to your paid Raydar subscriptions. You can use this section to track the status of your payments and access your invoices for completed purchases.
Tracking Your Transactions
Each row in the table represents a payment attempt or transaction and provides the following key information:
- Date: The date the transaction was initiated.
- Referral ID: A unique transaction identifier.
- Payment Status: The current state of your payment. This status allows you to quickly see the result of the purchase:
- Done / Success: The payment was successfully processed, and your subscription is active.
- Failed: The payment attempt was unsuccessful (e.g., card declined, incorrect details).
- In progress / Pending: The payment is currently being processed and is awaiting final confirmation.
- Last Update: The date the transaction status was last modified.
- Invoice: For successful (Done) transactions, a button labeled Invoice appears, allowing you to download or view your official receipt.
My Account: Rewards
Bu ekran, Raydar uygulamasında ATW Token ile ilgili genel durumu ve referans yapısını özetler. Alt kısımdaki görev başlıklarının detaylarına girilmez; burada yalnızca üst seviye bilgilendirme yapılır.
| Headings | Description |
|---|---|
| Total Rewards | Kullanıcının Raydar ekosistemi içerisindeki tüm aktivitelerinden kazandığı toplam ATW Token miktarını gösterir. |
| Referral Code & Link | - Her kullanıcıya özel olarak üretilen referans kodudur. - Yeni bir kullanıcı kayıt olurken bu kodu girerse, referans sistemi aktif olur. - Bu yapı sayesinde kullanıcıların birbirini davet ettiği sürdürülebilir bir ekosistem oluşur. |
| Social Share | Referral Link’in altında yer alan sosyal medya ikonları hızlı paylaşım için tasarlanmıştır. |

Register2Earn
Bu bölüm, Register2Earn kapsamında kazanılan ATW Token ödüllerinin detaylarını gösterir. Register2Earn, Raydar ekosistemine katılımı teşvik eden temel ödül mekanizmalarından biridir.
- Sağ üst tarafta yer alan Earned alanı, Register2Earn üzerinden kazanılan toplam ATW miktarını gösterir.
- Görselde bu değer 10 ATW olarak görüntülenmektedir.
Register2Earn satırının en sağında bulunan detay butonuna tıklandığında, ödüle ait ayrıntılar açılır:
- ATW Token’ın hangi işlem sonucunda kazanıldığı,
- Ödülün ne zaman tanımlandığı,
- İlgili işlem açıklaması

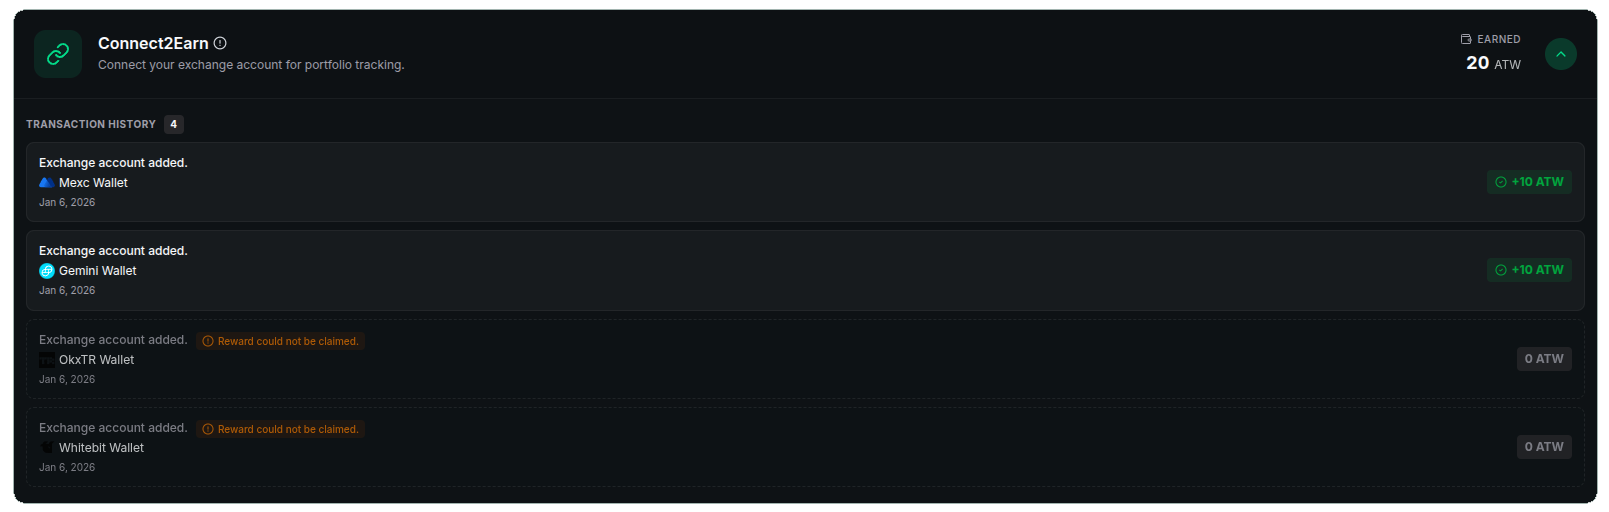
Connect2Earn
Bu bölüm, Connect2Earn kullanıcının Raydar’ına bağladığı account üzerinden kazandığı ATW Token ödüllerini gösterir. Connect2Earn mekanizması, aktif ve doğrulanabilir hesap bağlantılarını teşvik eder.
- Her yeni bağlanan account için kullanıcı 10 ATW Token kazanır.
- Sağ üst köşede yer alan Earned alanı, Connect2Earn kapsamında kazanılan toplam ATW miktarını gösterir.
- Görselde, iki farklı borsa bağlantısı üzerinden toplam 20 ATW kazanıldığı görülmektedir.
Alt bölümde yer alan Transaction History alanı, ödüllerin hangi hesap bağlantılarından geldiğini detaylı şekilde listeler:
- Hangi borsa hesabının bağlandığı,
- İşlemin tarihi,
- Bağlantı sonucunda kazanılan ATW miktarı.
Bazı hesap bağlantılarında ödül kazanılamadığı durumlar olabilir. Bu senaryolar alt listede turuncu uyarı ile gösterilir:
- Daha önce bağlanmış bir borsa hesabı tekrar eklendiğinde,
- Manuel olarak oluşturulan wallet’lar bağlandığında,
ilgili işlem için ödül verilmez. Turuncu uyarı metni, neden ATW kazanılamadığını açıkça belirtir.
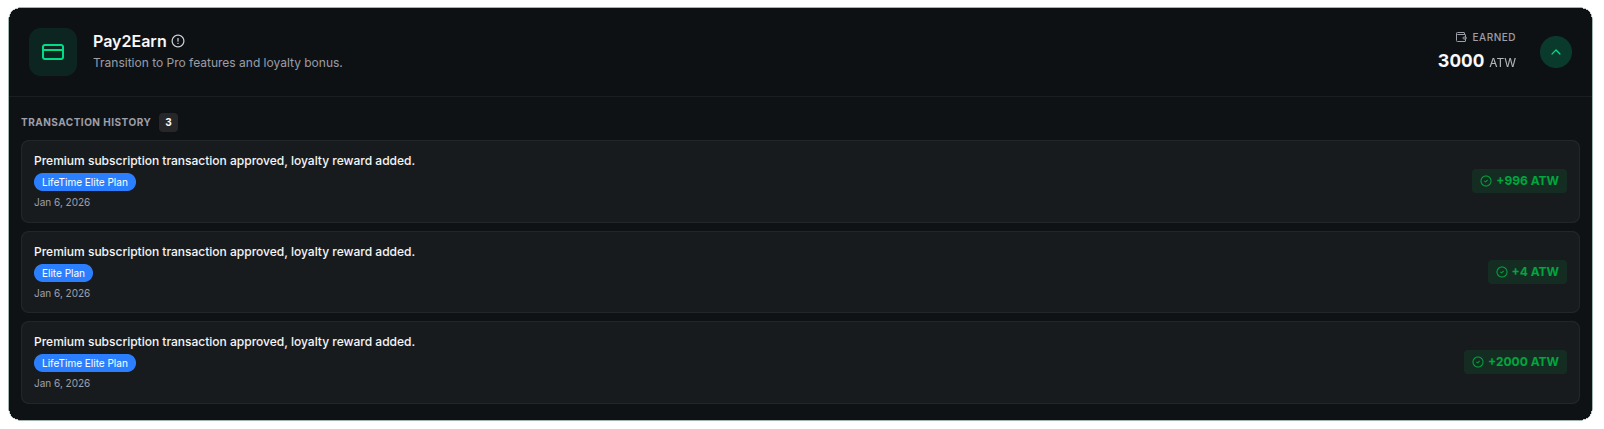
Pay2Earn
Bu bölüm, Raydar uygulaması içerisinde yapılan paket satın alımları üzerinden ATW Token kazanımını ifade eder.
- Kullanıcı, Raydar içi paket satın aldığında ATW Token kazanır.
- Sağ üst köşede yer alan Earned alanı, Pay2Earn kapsamında şimdiye kadar kazanılan toplam ATW miktarını gösterir.
- Pay2Earn üzerinden kazanılabilecek maksimum ATW miktarı 3000 ATW ile sınırlandırılmıştır.
Alt bölümde yer alan Transaction History alanında:
- Satın alımın hangi tarihte yapıldığı,
- Hangi paket üzerinden ödül kazanıldığı,
- İlgili işlem sonucunda kazanılan ATW miktarı
Refer2Earn
Bu bölüm, kullanıcının davet ettiği referanslar üzerinden kazandığı ATW Token ödüllerini gösterir. Refer2Earn modeli, hem referansın aktivasyonu hem de yaptığı harcamalar üzerinden ödül kazandırır.
- Sağ üst köşede yer alan Earned alanı, Refer2Earn kapsamında kazanılan toplam ATW miktarını gösterir.
- Bu toplam, referansların kayıt ve aktivasyon işlemleri ile paket satın alımlarından elde edilen kazançların birleşimidir.
Referans süreci şu şekilde işler:
- Kullanıcı kendi referans kodunu bir arkadaşıyla paylaşır.
- Arkadaş, Raydar’a kayıt olurken bu referans kodunu girer.
- Kayıt sonrası en az bir account bağlandığında referans aktivasyonu tamamlanır.
- Bu aktivasyon sonucunda davet eden kullanıcı +3 ATW kazanır.
Alt bölümde yer alan Transaction History alanında iki farklı kazanç türü ayrı ayrı gösterilir:
- Registration: Referansın kayıt olup bir account bağlayarak hesabını aktif etmesi sonucu kazanılan ATW miktarı.
- Purchases: Referansın Raydar içerisinde paket satın alımı yapması sonucu kazanılan ATW miktarı.
Purchases kapsamında, Pay2Earn mekanizması üzerinden referansların kazandığı toplam ATW miktarının %10’u davet eden kullanıcıya ek kazanç olarak yansıtılır.

Share2Earn
Support atWallets on social media and earn rewards:
- Earn 1 ATW per task.
- Follow on Twitter, join Discord or Telegram, or interact with videos.

Use2Earn
Earn ATW simply by using Raydar:
- Execute trades, use smart calculators, or set price alerts.
- No limits—the more you use Raydar, the more ATW you accumulate.

B2B2Earn
Refer companies that need our infrastructure:
- Manual rewards start from 10,000 ATW and above.

My Alarms
The alarm feature instantly notifies you when the price of a selected coin reaches a defined level.
It allows you to stay in control of the market without constantly monitoring price movements.
What Does an Alarm Do?
- Monitors the price of the selected coin and trading pair
- Triggers when the defined condition is met
- Sends a notification if the condition is met on any of the exchanges you selected
- Allows you to choose from the exchanges connected to Raydar and notifies you when the condition is met on any of them
- Remains active until the alarm is triggered
How to Create an Alarm
- In the Raydar application, click the Alarm icon located in the top-right corner.
- In the opened popup, click + Add New to create a new alarm.
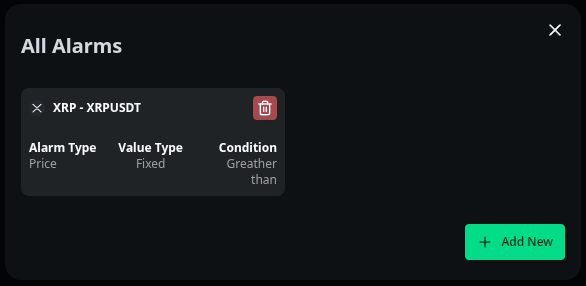
Alarm Settings
When creating an alarm, configure the following fields:

-
Coin
Select the coin you want to monitor
Example:XRP -
Alarm Type
Defines what data the alarm will track
Supported options:Price→ Triggers based on priceProfit / Loss→ Triggers based on profit or loss
-
Value Type
Determines how the trigger value is calculated
Supported options:Fixed→ Fixed numeric valuePercent→ Percentage-based value
-
Condition
Defines when the alarm will be triggered
Supported options:Greater than→ Triggers when the value goes above the defined levelLess than→ Triggers when the value goes below the defined level
-
Symbol
Trading pair to monitor
Example:XRPUSDT -
Exchange
Select the exchanges where the alarm will be active
Multiple exchanges can be selected
Example:Binance,BingX,Gate.io -
Value
The target value that triggers the alarm
Example:1.9452(Fixed)5%(Percent)
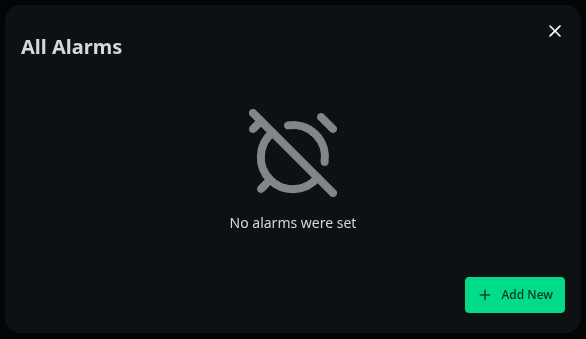
Viewing and Managing Alarms
You can view all the alarms you have created by clicking the Alarm icon located in the top-right corner of the Raydar application.
From this screen, you can easily monitor and manage your alarms.
- To delete an existing alarm, simply click the delete (trash) icon on the alarm card.
- To create a new alarm, use the + Add New button located at the bottom-right corner of the screen.
After an alarm is created, Raydar continuously monitors the defined condition.
When the condition is met, the alarm is triggered and you receive a notification.
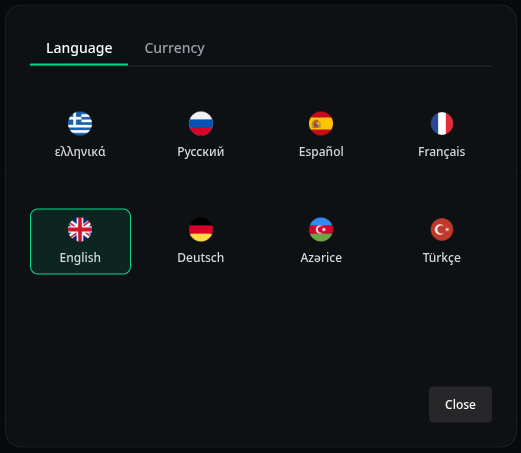
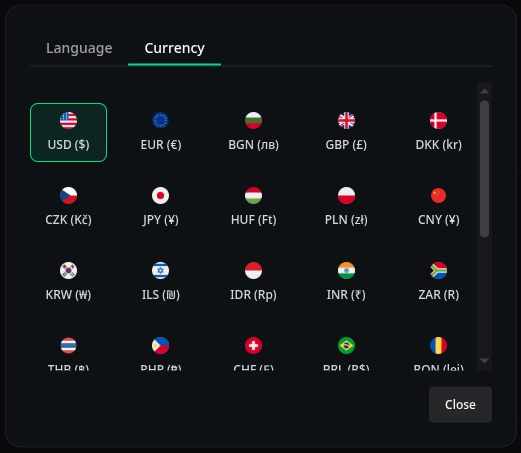
How to Change Currency in Raydar?
To change the currency in the Raydar application, follow the steps below:
- Click the Globe (🌐) icon located in the top-right corner of the application.
- In the popup window, you will see the Language and Currency tabs.
- Switch to the Currency tab to change the currency.
- Select the currency you want to use from the list.
After making your selection, all prices and portfolio values in Raydar will be displayed using the selected currency.
To change the application language, use the Language tab.
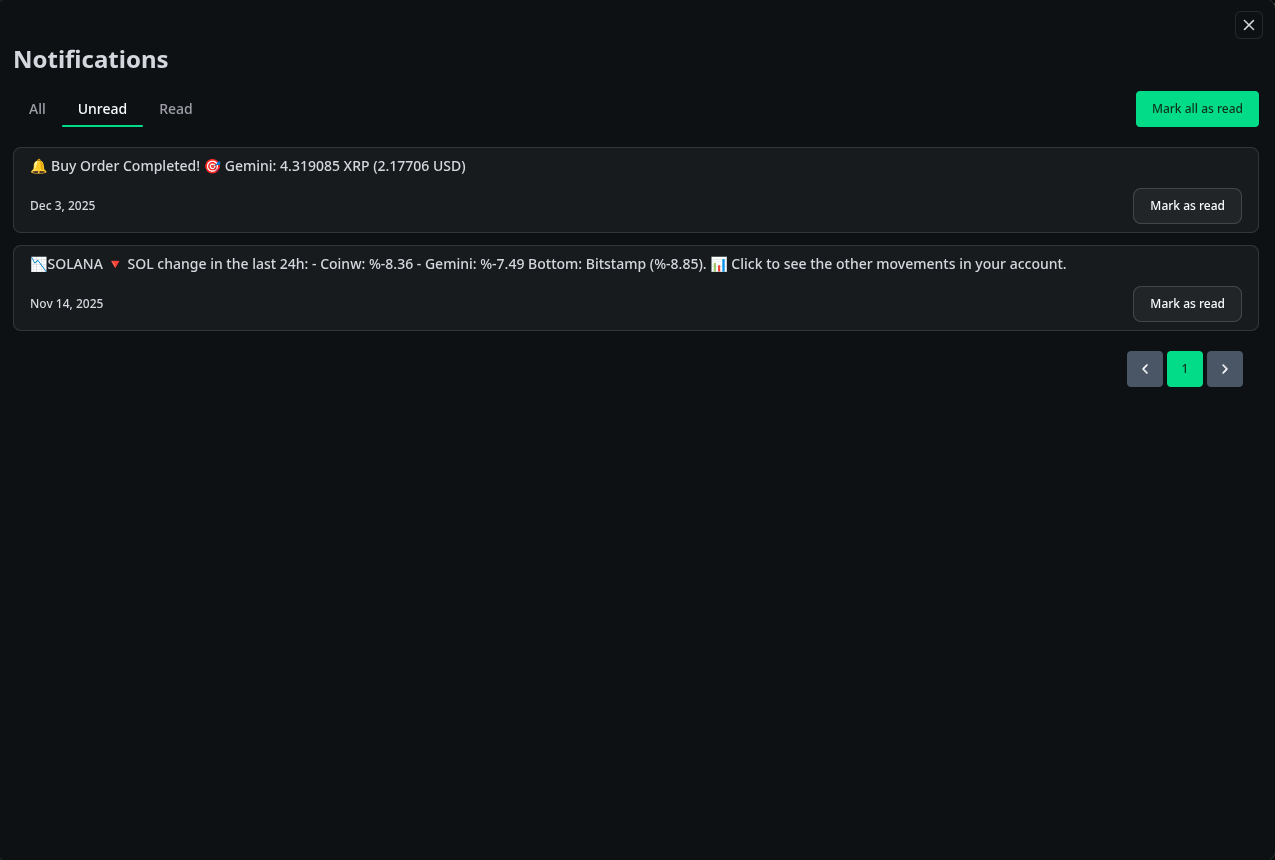
Notifications
The Notifications section displays all messages related to your activity in Raydar.
You can view:
- Daily notifications
- Order notifications
- Alarm notifications
To open notifications, click the bell icon in the top-right corner of the application.
Click See all to open the full notifications page.
On the notifications page, you can:
- View All / Unread / Read notifications
- Read long messages in full
- Mark notifications as read
- Browse older notifications